Showing posts with label Rice. Show all posts

Wednesday, August 16, 2023

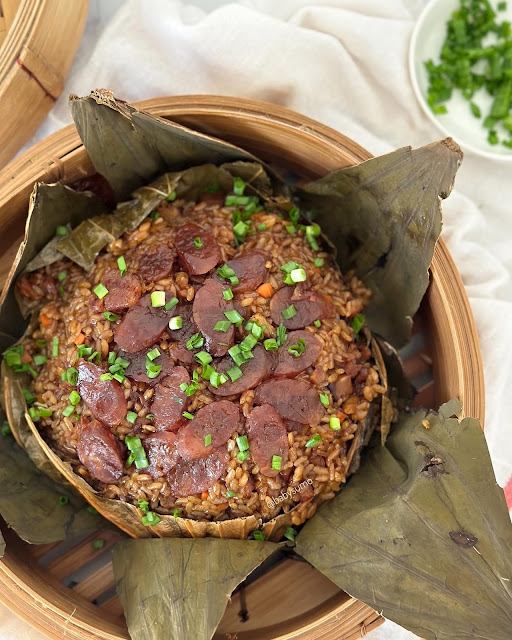
Recipe: Hor Yip Fan (Lotus Leaf Wrapped Rice)

You've probably come across this dish, Hor Yip Fan (Lotus Leaf Wrapped Rice) at a wedding banquet dinner or a celebratory Chinese New Year meal. We always make sure we have some tummy space left at the end of the 9-course meal to enjoy this.

Hor Yip Fan


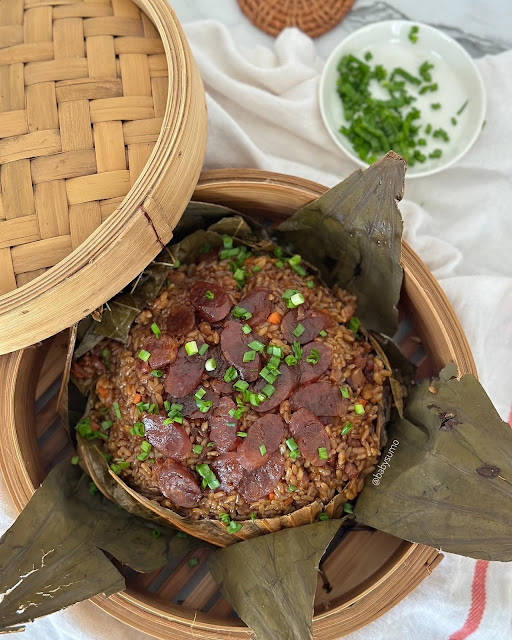
Now, you don't have to wait for CNY or wedding banquets to come around to enjoy this. Glutinous rice, along with dried shrimp, Chinese sausage, mushroom and carrots are wrapped in lotus leaf and steamed. The lotus leaf lends a lovely aroma to the dish. Fragrant and flavourful, it’s hard to stop at one bowl.

Hor Yip Fan (Lotus Leaf Wrapped Rice)


I'm using pearl glutinous rice which holds it shape even after steaming; soft individual grains. It is best to soak two leaves and overlap them to cover any gaps/holes you find.

Buy dried ingredients here:
Pearl glutinous rice: https://shope.ee/5AP36XdB6h
Lotus leaf: https://shope.ee/6fDqt9tBQu
Chinese sausage: https://shope.ee/8pIGZOGADO
Dried shrimp: https://shope.ee/10QSCWntoH
Dried Chinese mushroom: https://shope.ee/A9ijTzj0GO


Step-by-step YouTube recipe video here:


Hor Yip Fan (Lotus Leaf Wrapped Rice)
Recipe by Baby Sumo
Preparation time: 15-20 mins
Cooking time: 1 hour
Serves 4


Ingredients
1 pair Chinese sausage
1 cup pearl rice glutinous, soaked for 6 hours
25g dried shrimp
6 dried mushrooms, soaked for 2 hours
1 carrot, peeled and diced
Spring onion
2 dried lotus leaves
1 shallot
2 cloves garlic
3T cooking oil


Seasoning
1 1/2T light soy sauce
1T oyster sauce
1 tsp dark soy sauce
1/4 tsp white pepper
1T Shaoxing wine


1. Place Chinese sausage on a heatproof plate, then pour boiling water over it. Leave for 5 mins, then peel off the skin from the sausage. Slice one sausage thinly at an angle. Dice the other sausage.
 
2. Rinse and soak lotus leaves for 1 hour. Bring water to boil in a wok. Boil leaves for 5 mins, until they are pliable. Remove and set aside to cool.


3. Soak dried shrimp in 1/2 cup water for 2 hours. Drain and reserve the soaking water.
Heat 1T oil in wok/pan. Add the sliced Chinese sausage and sauté for 2 mins until fragrant. Remove and set aside.

4. Add remaining oil. Once hot, add the shallot and garlic, and sauté for 2 mins until lightly golden. Then, add dried shrimp and diced Chinese sausage and sauté for further 2 mins. Next, add the carrot and Chinese mushroom and sauté for further 2 mins.

5. Drain rice and add to the wok, stirring well to coat. Then add seasoning and reserved (1/2 cup) dried shrimp soaking water and mix well. Cook until water has been absorbed, about 4-5 mins.

6. Line a deep bowl with lotus leaf, overlapping to cover any holes/ gaps. Lightly brush with some oil.
Arrange sliced Chinese sausage in the centre, then fill with rice mixture. Press down using a spoon to compact. Fold leaves in to form a parcel.

7. Invert parcel onto a steamer basket or heatproof plate. Place in your steamer (or wok filled with water and steamer rack) and steam over high heat for 45 mins. Do check occasionally and top up your steamer with boiling water so it doesn’t dry out.

8. Turn heat off and allow to cool for 10 mins, then cut open and serve. You can cut it in this star shape for a more attractive presentation. 


Hor Yip Fan (Lotus Leaf Wrapped Rice)

Hor Yip Fan (Lotus Leaf Wrapped Rice)

If you enjoyed reading my posts, LIKE me on Facebook! You can also follow me on Instagram (@babysumo) for more photo updates or subscribe to our YouTube channel. Thanks :)

Monday, February 13, 2023

Recipe: Mushroom Risotto

Say I love you on Valentine’s Day, with a heartwarming bowl of risotto cooked with love. This meatless risotto recipe is made this using king oyster mushroom and vegetable stock. King oyster mushrooms have a nice meat-like texture and also lots of umami flavours.

This is a very simple recipe you can prepare at home; a very pleasing, delicious Valentine's meal with minimum effort. ;)


Check out the reels here:


Mushroom Risotto
Recipe by Baby Sumo
Preparation time: 5 mins
Cooking time: 25-30 mins
Serves 4

Ingredients
250g arborio rice
1 yellow onion, finely chopped
2 tbsp olive oil
2 tbsp salted butter
1.2l vegetable stock
30g freshly grated Parmiagiano Reggiano, plus extra for garnishing
2 tsp chopped chives

For the mushroom
2T olive oil
2T salted butter
200g king oyster mushroom
2 tsp mushroom seasoning

1. Cut about 1.5 inch from the top of the mushrooms and thinly slice. Cube the rest of the mushrooms.


2. Heat 1 tbsp oil and 1 tbsp butter and sauté the cubed mushrooms for 4-5 mins, then season with mushroom seasoning. Repeat with sliced mushroom, cooking until they’re browned around the edges.

3. Heat oil and 1 tbsp butter in a pan. Sauté onions for 2 mins. Add arborio and toast for a min, until the rice is crackling. Add stock, about 200ml at a time, and stir occasionally to massage out the starch from the rice. Cook for about 20-25 mins, until rice is al dente.

4. Stir in cubed mushrooms to the risotto. At this point, your risotto should still be a little soupy (not too dry). Stir in Parmesan and 1tablespoon of butter. Your risotto should be creamy now.


5. Serve risotto with sliced mushrooms and chives. Grate more Parmesan if you like.


If you enjoyed reading my posts, LIKE me on Facebook! You can also follow me on Instagram (@babysumo) for more photo updates or subscribe to our YouTube channel. Thanks :)
Friday, June 3, 2022

Recipe: Nyonya Chang (Nyonya Rice Dumpling)

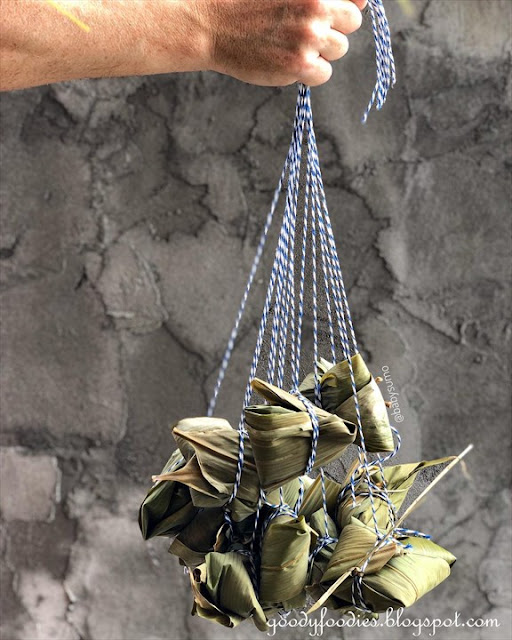
 A few years ago, I had my first Nyonya chang in Melaka, and I fell in love with it instantly. Fast forward to 2022, and I made my first ever Nyonya chang at home. :)

What's special about Nyonya chang? Nyonya chang is tinted blue with blue pea flower and is filled with a sweet-savoury pork filling, which includes minced pork flavoured with coriander powder and candied winter melon. 

Nyonya chang recipe


With online shopping these days, you can find all your ingredients for making rice dumplings in one place. My favourite dried goods shop, Great Ocean Dried Seafood, even came up with a ready pack Nyonya dumpling set which comes with all the dried ingredients needed to make the Nyonya chang (ie glutinous rice, dried shrimp, tea flower dried mushroom, coriander seed, white pepper, blue pea flower, winter melon, bamboo leaves and cotton rope). So convenient! You can buy it here: https://shope.ee/L8RAR7htA

Nyonya Chang ingredients


There is quite a lot of work involved in making rice dumplings, so I highly recommend doing the prep one day ahead so you can concentrate on the wrapping the following day. I've listed out the tasks according to days below to help with the preparation.

Hope you all enjoy your rice dumplings this Duan Wu Jie (Dragon Boat Festival)! Wish you good health 端午安康 (Duān wǔ ān kāng) on this day.

Nyonya Chang Recipe

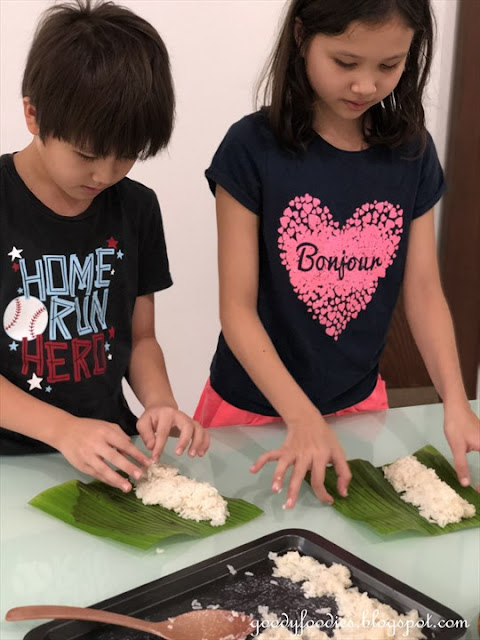
Wrapping Nyonya Chang


Nyonya Chang (Nyonya Rice Dumpling)
Recipe by Baby Sumo
Makes 12-18 Nyonya chang (depending on size)

Ingredients
1 pack Nyonya dumpling set from @greatoceandriedseafood

For the pork filling
500g minced pork
100g shallots, finely chopped
25g garlic, minced

Pork seasoning
1 1/2 tbsp dark soy sauce
2 tbsp light soy sauce
1 tbsp taucu
1 tbsp brown sugar
1 tsp white pepper

Day 1
1. Soak bamboo leaves in cold water for at least 12 hours.

2. Toast coriander seeds for 15 mins in hot pan, then grind to fine powder using a spice grinder pestle an mortar.

3. Soak dried shrimp and mushroom for 3 hrs, then roughly chop.

4. Roughly chop candied winter melon.

5. Heat 4 tbsp cooking oil. Sauté garlic and shallots for 3-4 mins, then brown pork. Add dried shrimp, mushroom, winter melon, 7 tbsp coriander powder and seasoning. Cook for 8-10 mins. Cool then store in fridge.

6. Soak blue pea flower in 1.5 cup hot water for 15 mins. Remove flowers and pour in 200g glutinous rice. Soak overnight.

7. Place 600g glutinous rice with 1 tsp salt in large bowl with cold water and soak overnight.

Day 2
1. Clean bamboo leaves.

2. Drain water from both rice.

3. Sauté 2 shallots (sliced) in 1/2 cup oil.

4. Mix 2tbsp shallot oil with blue rice along with 1/4 tsp salt.

5. Place white glutinous rice in wok with shallot oil and 1.5 tsp salt and sauté for 3-4 mins.

6. Measure out 1.1m length of cotton rope and cut. You will need approx. 12-18 of these, depending on how many you will be making. Hang them up at eye level, (I tie mine to my grille) in preparation for wrapping/tying later.

7. Use 2 leaves to form a cone. Fill with 1 tbsp blue rice, 2 tbsp pork filling and 1-2 tbsp white rice, leaving a small space at the top. Seal and tie securely with cotton rope. (There are many YouTube videos you can watch to learn how to wrap your rice dumplings).

Wrapping Nyonya Chang


8. Bring a large pot of water to boil with 1 tbsp salt and several knotted pandan leaves. Gently lower Nyonya chang in and simmer over low heat for 3 hours.

9. Remove and place on wire rack to dry and cool down. Once cooled, you can place them in the fridge. You can also store them in the freezer for up to a month.  

10. Before eating, reheat by steaming over high heat for 10 mins.


Nyonya Chang Recipe


Our first Nyonya chang making experience video here:


If you enjoyed reading my posts, LIKE me on Facebook! You can also follow me on Instagram (@babysumo) for more photo updates or subscribe to our YouTube channel. Thanks :)

Wednesday, November 24, 2021

Recipe: Thai Braised Pork Collar Rice

Braised pork leg rice, aka khao kha moo ข้าวขาหมู is one of my favourite Thai rice dishes. A famous Thai street food fish, a whole pork leg is braised in spices and soy sauce until tender and falling off the bone.

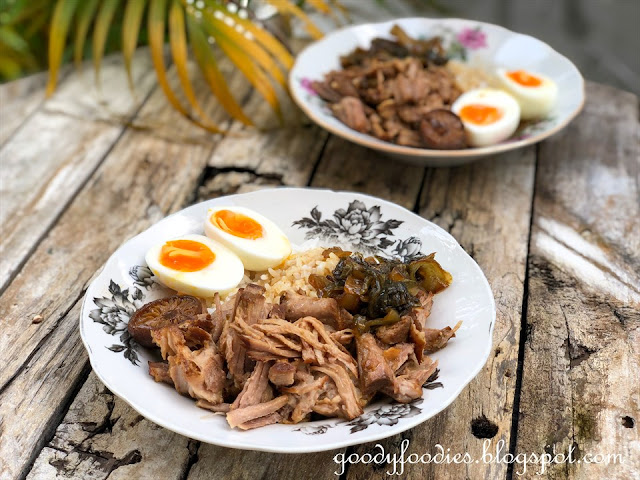
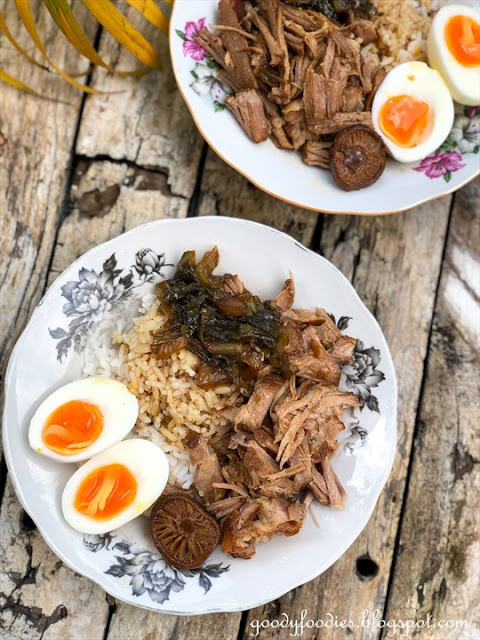
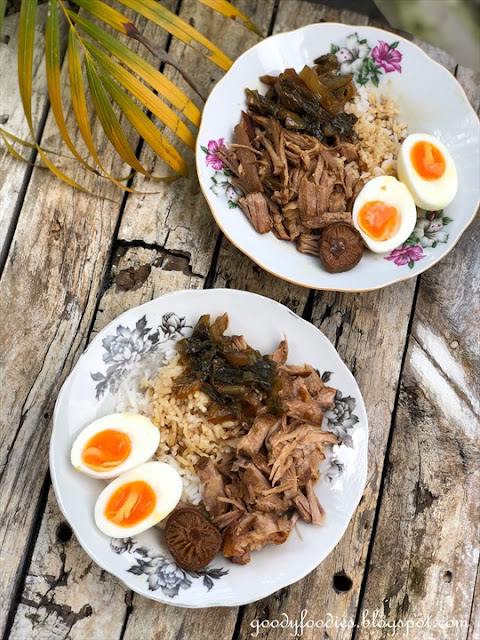
However, when I make it at home, I use pork collar instead of pork leg, mainly because my kids prefer this leaner cut of meat. Pork collar still has pretty good marbling and some fat to keep the meat nice and moist when braised. Once braised for two hours, I roughly shred the meat and serve it with rice, Chaoshan sour vegetables and soft boiled eggs. Utterly delicious!

Thai Braised pork collar rice


Thai Braised Pork Collar Rice ข้าวคอหมูตุ๋น 
500g pork collar
4 shitake mushrooms, rehydrated
100g Chaoshan sour mustard, sliced
3 cups cooked rice
4 7-min soft boiled eggs

For the braising liquid
3 cups water
1T dark soy sauce
2T light soy sauce
1 cinnamon stick
2 star anise
1 bay leaf
6 cloves garlic, crushed
3cm old ginger
2 tsp palm or brown sugar
1/8 tsp Szechuan peppercorn
A few dashes white pepper

1. Place braising liquid ingredients in a pot. Bring to the boil.

2. Add pork and mushrooms and braise over low heat for 2 hours, flipping the meat halfway through. Remove and once cool, roughly shred.

3. Rinse sour mustard with water at least 4 times. Drain and set aside.

4. Strain braising liquid. Add sour mustard and simmer over low heat for 10 mins.

5. Place rice in shallow plate, top with pork, sour mustard and 7-min soft boiled egg. Spoon over some sauce onto the rice.

Thai Braised pork collar rice

Thai Braised pork collar rice
khao kha moo khao kha moo khao kha moo khao kha moo khao kha moo khao kha moo  khao kha moo
If you enjoyed reading my posts, LIKE me on Facebook! You can also follow me on Instagram (@babysumo) for more photo updates or subscribe to our YouTube channel. Thanks :)
Monday, October 11, 2021

Recipe: Bara Chirashi Don ばらちらし

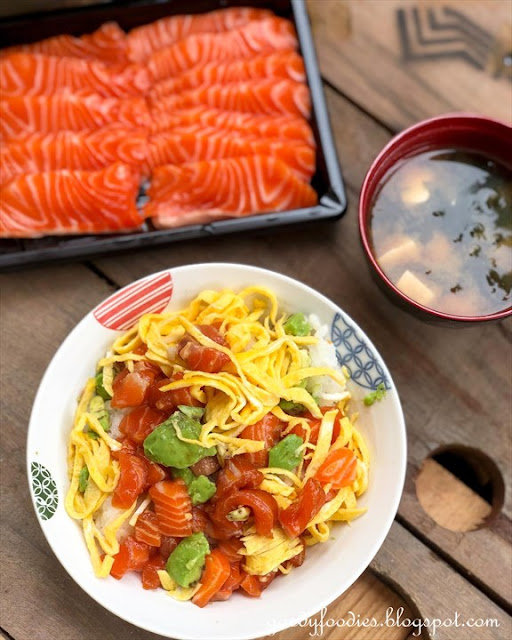
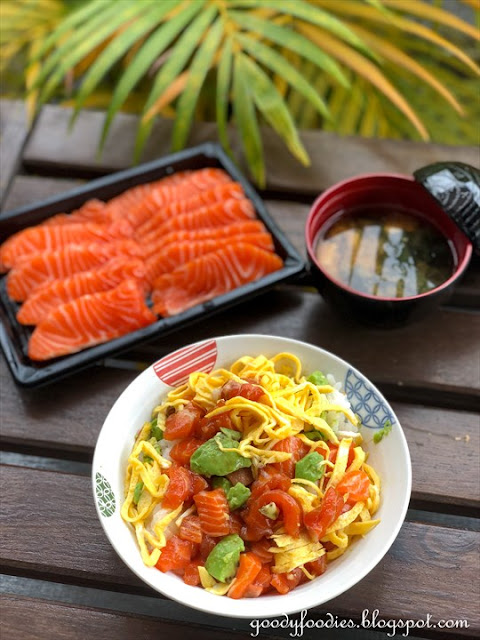
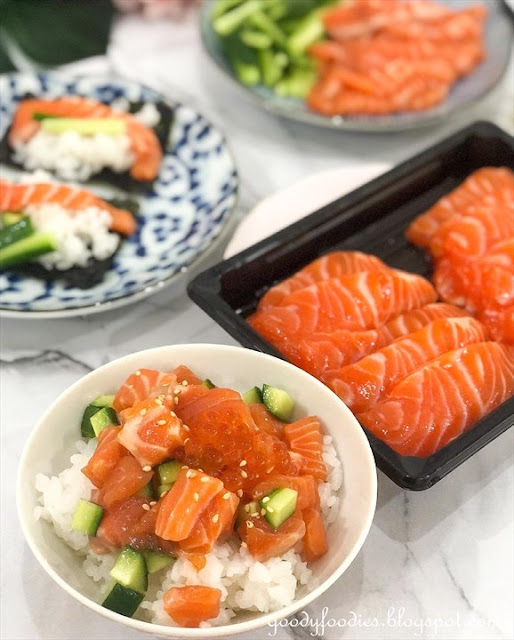
One of my favourite things to order and eat at the Japanese restaurant is bara chirashi don. It is an affordable yet delicious way to enjoy Japanese food. Bara chirashi don, is a Japanese rice bowl with chopped raw fish (usually a variety of fish - salmon, tuna, octopus, tobiko), vegetables (cucumber, pickles or avocado) and tamago (eggs). The raw fish is usually cubed and marinated with soy sauce and mirin.

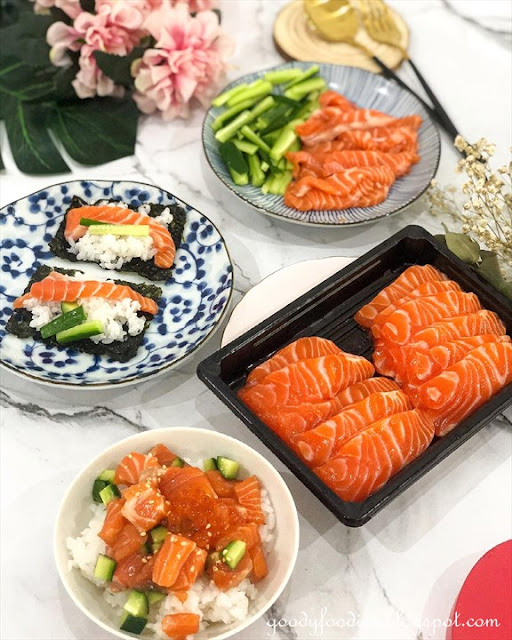
At home, we make our own bara chirashi don using salmon only since this is the most accessible raw fish for us. Bara chirashi, for us, is best enjoyed with a hot bowl of miso soup and EXTRA sashimi. 

Bara chirashi don recipe


Bara chirashi don recipe


Bara chirashi ばらちらし
Recipe by Baby Sumo
Preparation time:15 minutes
Serves 4


Ingredients
300g sashimi grade salmon fillet, cubed
1 tbsp Japanese soy sauce
1/8 tsp wasabi
1 avocado, peeled and cubed
3 cups cooked Japanese short grain rice
1/2 Japanese cucumber, small cubes (optional)
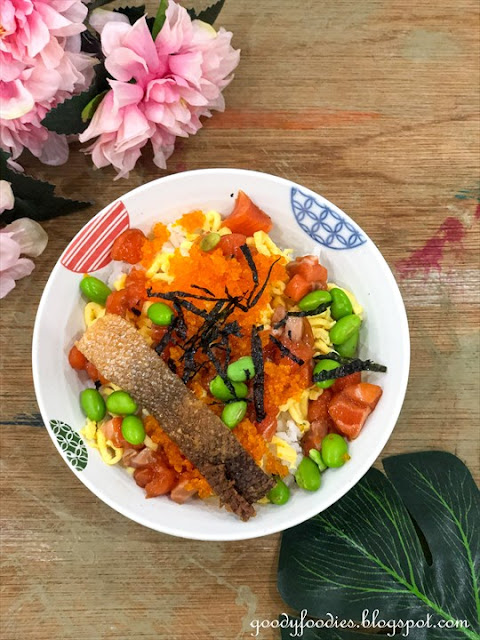
50g tobiko or ikura (optional)


For the sushi rice vinegar
2 tbsp rice vinegar
1/2 tbsp caster sugar
1/2 tsp salt

For the thin omelette
2 eggs
1/2 tsp sugar
A pinch of salt
Cooking oil


1. Combine the rice vinegar, caster sugar and salt in a small bowl, until sugar and salt has dissolved. Pour the vinegar mixture over the rice and using a spatula, mix the rice and vinegar mixture. Cool the rice to room temperature. 

2. Next, cook the thin omelette. Beat the eggs with sugar and salt. Coat a frying pan with a thin layer of oil and heat over medium heat. Pour half the egg into the pan and swirl so eggs spread evenly to coat the base of the pan. Cook until eggs have set. Set aside to cool. Once cool, roll the omelette and thinly slice.

3. Mix soy sauce and wasabi in a bowl and then toss the sashimi cubes.

4. Divide rice into four bowls. Top with omelette, sashimi and avocado. Enjoy with hot miso soup and more sashimi!


Tip: You can also top the bara chirashi with toasted nori (seaweed). My son also enjoys making his own sushi / maki so it's good to have some nori seaweed on hand. 

Bara chirashi don recipe

Bara chirashi don recipe

Bara chirashi don recipe
Bara chirashi don recipe Bara chirashi don recipe Bara chirashi don recipe Bara chirashi don recipe Bara chirashi don recipe Bara chirashi don recipe Bara chirashi don recipe Bara chirashi don recipe
If you enjoyed reading my posts, LIKE me on Facebook! You can also follow me on Instagram (@babysumo) for more photo updates or subscribe to our YouTube channel. Thanks :)

Friday, May 21, 2021

7-Eleven Malaysia Introduces New Onigiri Flavours You Don't Want to Miss


Onigiri lovers, rejoice! 7-Eleven Malaysia has launched new onigiri flavours due to overwhelming response. These freshly-cooked plump rice stuffed with salmon, wasabi abalone and other fillings wrapped in savoury nori (dried seaweed) can be conveniently eaten with one hand anytime, anywhere.

Fulfil the Nihonjin in you with the Chuka Idako Onigiri (RM4.50). The Chuka Idako flavour features baby octopus seasoned in thick red sauce and sesame seeds – a sweet and chewy delight.

Salmon Teriyaki Onigiri (RM4.20), on the other hand, is reminiscent of a simple meal of rice with salmon teriyaki you wouldn’t want to miss.

For a classical Japanese bite, try the Smoked Salmon Cream Cheese Onigiri (RM4.50) that is guaranteed to satisfy your cheesy cravings with its tangy and nutty flavour.

The Tobiko Kani Mayo Onigiri (RM4.20) delivers big on the umami and is an easy way to quench your Japanese-food hankerings.

Want to try something different? Go for Soy Garlic Chicken Onigiri (RM3.70). Infused with soy, ginger, and garlic marinade, its crunchy and salty-sweet goodness will definitely satisfy your cravings.

Pamper your taste buds with Wasabi Abalone Onigiri (RM5.00). This sumptuous premium rice balls is sure to meet your sky-high taste standards and leave you longing for more.

You can also opt to indulge in the Unagi Onigiri (RM5.50) for a luxurious bite during your snack time or meal time. You’re going to wish you were introduced to this gem much sooner!

Alternatively, you can check out the existing variations. The taste of the Teriyaki Chicken Onigiri (RM3.70) is super on point! Not only is it delicious, this healthy chicken recipe is also super filling.

Tuna Mayo Onigiri (RM3.70), on the other hand, is the all-time favourite of many customers. Experience rich flavour and pleasing texture with the perfect blend of mayo and high quality tuna flakes.

Grab these yummy onigiri flavours exclusively in your nearest selected 7-Eleven store today.Whether it is for lunch paired with a sumptuous packed meal or just a snack consumed with a hot cup of coffee, it hits all the right spots.


7-eleven malaysia onigiri

Besides Onigiri,the Fresh Food section of 7-Eleven is a mini food court that caters to a myriad of taste buds. Remember to get your hands on other delectable foods such as ready-to-eat meals from spaghetti and macaroni to local staples such as nasi lemak,fried mee hoon and savoury snack, to beverages such as bean-to-cup coffee, fruit juices, soft serve and not forgetting the evergreen Slurpee!

Be sure to download sign up as a My7E Loyalty App member to enjoy savings as well as exclusive deals and rewards right at your fingertips 24/7.
7-Eleven Malaysia new onigiri flavours 7-Eleven Malaysia new onigiri flavours 7-Eleven Malaysia new onigiri flavours 7-Eleven Malaysia new onigiri flavours 7-Eleven Malaysia new onigiri flavours

If you enjoyed reading my posts, LIKE me on Facebook! You can also follow me on Instagram (@babysumo) for more photo updates or subscribe to our YouTube channel.Thanks :)

Saturday, September 12, 2020

Recipe: Paella with Chorizo, Tiger Prawns and Crispy Bacon

It's World Paella Day on 20 September! If you love paella and have always wanted to try making it at home, do give this easy recipe a try.

Paella is a rice dish originating from Valencia in Spain. It is most commonly eaten on Sundays or during lunchtime. For me, it's THE must-order dish whenever we visit a Spanish restaurant, other than the tapas. Vibrant and full of flavour, what's not to love?

Since I posted our recipe video on YouTube, I have been receiving requests to post the recipe on my blog too, so here it is!


Paella is usually made in a paellera, aka paella pan, however, if you do not own one of this, you don't have to rush out to get one. Instead, you can use a flat-based wok, which I believe most Asians would have in their kitchen.

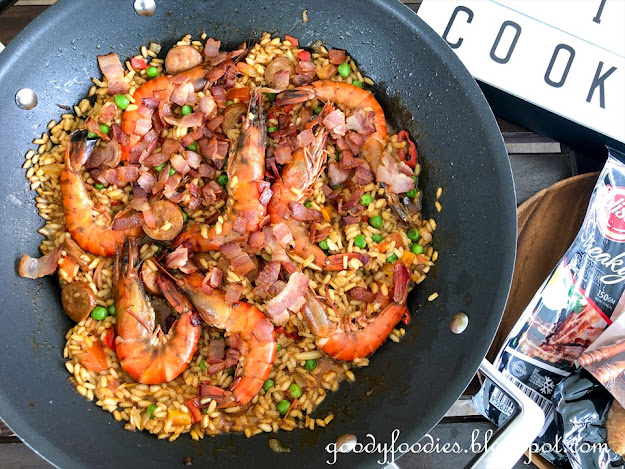
If you can get Spanish bomba rice, that would be the best for this dish, however if you can't, a good substitute would be arborio (which we use for making risotto) or Japanese sushi rice. For our paella, we added chorizo sausage, tiger prawns and crispy bacon - man, it was so flavorful and delicious! It was ssurprisingly easy to make too - if you've made risotto before, the process is pretty similar to that. 

Enjoy this recipe video we made for our YouTube channel too!


Paella with Chorizo, Tiger Prawns and Crispy Bacon
Recipe by Baby Sumo, inspired by Gordon Ramsay
Preparation time: 10 minutes
Cooking time: 45 minutes
Serves 4

Ingredients
200g chorizo sausage, sliced
150g streaky bacon, sliced
8 tiger prawns, trimmed
2 tbsp olive oil
2 cloves garlic, sliced
1/2 large yellow onion, finely chopped
3 mini sweet peppers, cubed
1 large red chilli, thinly sliced
1 1/2 tsp paprika powder
250g arborio rice
900ml chicken stock
1/4 tsp saffron strands, soaked in 2 tbsp hot water
2 large tomatoes, roughly chopped
1 cup frozen peas, thawed
Sea salt and freshly ground black pepper


1. In a large wok, heat oil over medium high heat. Cook for 5-8 minutes, until bacon is crispy. Remove bacon and set aside.

2. Add onion, garlic and peppers and saute for 2 minutes, until vegetables are softened. Add chorizo sausage, paprika and red chilli and cook for 2-3 minutes.

3. Add rice and stir for 2-3 minutes, until rice is coated in oil. Then, pour in chicken stock, saffron and tomatoes and simmer for 20 minutes over medium heat, stirring frequently, until rice is tender. If the paella gets too dry before it's ready, you can add in extra water, about 100ml at a time. Season with salt and freshly ground pepper as necessary.

4. Once the rice is tender and 85% of the stock has been absorbed, stir in the peas. Then, arrange the tiger prawns over the top of the paella, cover and simmer for a further 5 minutes, until prawns are cooked.


5. Sprinkle the crispy bacon over the paella and enjoy!

paella recipe paella recipe paella recipe paella recipe paella recipe paella recipe paella recipe
If you enjoyed reading my posts, LIKE me on Facebook! You can also follow me on Instagram (@babysumo) for more photo updates or subscribe to our YouTube channel. Thanks :)

Friday, August 14, 2020

Recipe: Pad Krapow Gai (Thai Basil Chicken)

Pad krapow gai, also known as Thai basil chicken is one of the easiest, healthy meals you can rustle up in your kitchen. It is just as nice as the pork version, pad krapow moo which I make regularly too. 

I usually use chicken breast, which I mince up in no time at all. Chicken breast is great cos it's is nice, lean and soft. The chicken is cooked along with fish sauce, oyster sauce, bird's eye chilli and brown sugar, and I also add a dash of dark caramel sauce to give it some colour. Don't forget to toss in a large handful of holy basil leaf (or you can use Thai basil if you can't get the former) for that distinctive, fragrant aroma and flavour. Serve with a nice crispy egg, rice and cucumber slices for a complete meal!

Thai basil chicken Thai basil chicken Thai basil chicken Thai basil chicken Thai basil chicken Thai basil chicken Thai basil chicken Thai basil chicken Thai basil chicken Thai basil chicken 
Thai basil chicken (Pad Krapow Gai)
Recipe by Baby Sumo
Preparation time: 5 minutes
Cooking time: 12 minutes
Serves 4

Ingredients
350g minced chicken breast
2-4 bird's eye chilli, deseeded and minced
1 small onion, diced
2 tbsp cooking oil
1/3 cup water
1 tbsp fish sauce
1/8 tsp caster sugar
1 tbsp oyster sauce
1/2 tsp dark caramel sauce
1 1/2 cups Holy Basil leaves, washed

To serve
Rice, for 4
4 fried eggs 
1 Japanese cucumber, peeled and sliced


1. In a wok, heat oil over medium high heat. Once hot, add the onion and chilli and cook for 3-4 minutes, until the onions have softened.

2. Add the minced chicken and cook for about 5 minutes, until it is cooked through. Add water, fish sauce, brown sugar, dark caramel sauce and oyster sauce and cook for another 1 1/2 - 2 minutes, until the sauce has slightly reduced. Taste seasoning.

3. Stir in the holy basil leaves.

4. Serve immediately with white rice, fried egg and cucumber slices.
pad krapow gai pad krapow gai pad krapow gai pad krapow gai pad krapow gai pad krapow gai pad krapow gai pad krapow gai pad krapow gai pad krapow gai pad krapow gai pad krapow gai 

If you enjoyed reading my posts, LIKE me on Facebook! You can also follow me on Instagram (@babysumo) for more photo updates or subscribe to our YouTube channel. Thanks :)

Saturday, August 8, 2020

Eat Lah @ NOOK, Aloft Kuala Lumpur Sentral

Eat Lah is the latest dining concept by Aloft Kuala Lumpur Sentral, taking into account the new normal during this Restricted Movement Control Order period. Happening every Thursday to Saturday from 6pm to 10pm at NOOK, diners can enjoy unlimited servings of food from the Eat Lah menu in a safe dining environment. 

Upon arrival, guests must sign-in to the restaurant and their temperature will then be taken by one of the associates. To ensure a safe dining space, tables are well-spaced in accordance with the social distancing guidelines, with cutleries sealed in plastic, as well as provision of sanitizing wipes and a plastic resealable bag for your masks. 


On the Eat Lah menu, you will find both local and International favourites, ranging from salads, soups, noodles, asam pedas, claypot briyani gam, noodles, grilled goodies, sliders,dim sum, teppanyaki, and desserts. 

Each table is given order cards and pens to write the codes of their desired dishes. The dishes are then prepared a la minute by the chefs at one of nine live cooking stations and will be served to your table, so there is no need to go back and forth to the buffet line to get your food. Furthermore, the food is prepared to order hence it arrives piping hot at your table which definitely enhances the dining experience. Portions are just right too, so we do not feel overwhelmed and can sample more dishes from the menu.

Some of our favourite dishes from the Eat Lah menu include:

The Legendary Briyani Gam (chef's signature) - we went for the chicken briyani, served in a claypot along with acar, boiled egg, cashew nuts and raisin. So yum!

Beef Slider served with curly fries - BabySumoKids favourite!
Assam pedas Melaka - my favourite! I chose sea bass fillet, which went really well with the tangy and spicy sauce. So appetizing! You can also go for salmon, whole prawns or vegetable asam pedas.
Steamed dim sum for the kids
Grilled squid (starter of the day) which was incredibly good, with a charred, smoky flavour
Grilled prawns with garlic mashed potato and vegetables

Spaghetti with prawn aglio olio and Mac 'n' cheese were also winners for BabySumoKids

Must-have at NOOK - the Sarawak laksa!
Freshly steamed seabass in soy sauce
Dessert of the day
Mixed fruit platter with asam boi
Teh tarik ice cream


Eat Lah MenuEat Lah menu NOOK Aloft KL

NOOK Aloft KL NOOK Aloft KL NOOK Aloft KL NOOK Aloft KL NOOK Aloft KL NOOK Aloft KL NOOK Aloft KL NOOK Aloft KLNOOK Aloft KL NOOK Aloft KLNOOK Aloft KL NOOK 
Eat Lah is available for dinner only, from Thursday to Saturday (6pm-10pm) and is priced at RM138 per adult. Currently, you can enjoy the Eat Lah buffet at the welcome back promo price of RM98 nett and children under 12 receive 50% discount off the price. 

You can also stand a chance to win a free night stay at Aloft KL every week and a sister hotel every month in August and September 2020.

For reservations, please call 03-2723 1154 or email kulal.b&f@marriott.com

Location: NOOK, Level 1, Aloft KL Sentral, No 5 Jalan Stesen Sentral, 50470 Kuala Lumpur, Malaysia.

Website: https://www.marriott.com/hotels/hotel-information/restaurant/kulal-aloft-kuala-lumpur-sentral/


If you enjoyed reading my posts, LIKE me on Facebook! You can also follow me on Instagram (@babysumo) for more photo updates or subscribe to our YouTube channel. Thanks :)

Wednesday, August 5, 2020

How to Make Oyakodon (Recipe Video)

Oyakodon is one of the easiest donburi you can try making at home. Oyako, literally translates to "parent-and-child", referring to the chicken and egg used in making this dish.

Do check out our latest video on YouTube on how to make oyakodon - it's so simple, believe me! Even BabySumoKids can do it with minimal assistance.


Click here for the full recipe.
how to make oyakodon how to make oyakodon how to make oyakodon how to make oyakodon how to make oyakodon how to make oyakodon how to make oyakodon how to make oyakodon
If you enjoyed reading my posts, LIKE me on Facebook! You can also follow me on Instagram (@babysumo) for more photo updates or subscribe to our YouTube channel. Thanks :)

Friday, May 29, 2020

Recipe: Oyakodon (Japanese Chicken and Egg Rice Bowl)

Oyakodon is one of the easiest donburi you can try making at home. Oyako, literally translates to "parent-and-child", referring to the chicken and egg used in making this dish.

Oyakodon, Japanese chicken and egg rice bowl


Oyakodon is also a very healthy dish as it is cooked without any oil; the chicken is simmered along with onion and a stock made from dashi, mirin and Japanese soy sauce. For convenience, I am using the recipe for mentsuyu (scroll down for the recipe); any unused tsuyu can be stored for future use for soba or any other noodle dishes. Beaten eggs are added and allow to cook until just set, before serving on top of rice, along with a garnishing of spring onions and a bowl of miso soup. You may also sprinkle some shichimi togarashi spice, for an extra umami kick.


Click here to watch the step-by-step video instructions on How to Make Oyakodon.


Oyakodon (Japanese chicken and egg rice bowl)
Recipe by Baby Sumo
Preparation time: 10 minutes
Cooking time: 15-20 minutes
Serves 4

Ingredients
400g chicken fillet or breast, cut into bite-size pieces
2 medium yellow onion, thinly sliced
1 cup tsuyu (scroll down for recipe)
4 eggs, beaten

Rice, to serve
2 spring onion, finely chopped
Shichimi togarashi

1. In a large wok, place the onions, chicken and 1 cup of tsuyu. Over medium high heat, bring to a boil, then lower to medium heat and simmer for 10 minutes.

2. Pour beaten egg over the top and do not stir. Leave to cook until eggs have just set, about 1-2 minutes.

3. Fill each bowl with rice, then top with eggs, chicken and onions and some of the sauce. Garnish with spring onions. You may sprinkle on some shichimi togarashi if you like. Serve with miso soup.


For the tsuyu
Makes 800ml
3 cups water
1 pack (5g) instant dashi powder
2/3 cup Japanese soy sauce
2/3 cup mirin
1/2 tsp caster sugar

1. Place all ingredients into a saucepan. Over a medium heat, bring to a simmer and stir to dissolve the sugar. Allow to cool. Any unused amounts can be transferred to a bottle and stored in the fridge for a few months. You can use this with your soba or udon dishes.
Oyakodon recipe Oyakodon recipe Oyakodon recipe Oyakodon recipe Oyakodon recipe Oyakodon recipe Oyakodon recipe Oyakodon recipe Oyakodon recipe Oyakodon recipe Oyakodon recipe
If you enjoyed reading my posts, LIKE me on Facebook! You can also follow me on Instagram (@babysumo) for more photo updates or subscribe to our YouTube channel. Thanks :)


Thursday, April 30, 2020

Recipe: How to Make Lemang at Home

 This MCO (Movement Control Order) has got me cooking some things I never thought I'd ever attempt in my kitchen.

Lemang is one of our favourite things to eat during Ramadan and Raya. It is a traditional food made from glutinous rice, coconut milk and salt, cooked in a bamboo lined with banana leaves. Usually, you can see lots of stalls selling this by the roadside in the run up to Ramadan and you can also find it in hotel Ramadan buffets.

Lemang recipe


So, here's an easy, cheat's version of lemang that you can try at home, minus the bamboo. For my version, you first soak the rice for 3-4 hours, and then steam it for 25-30 minutes. The rice is then mixed with coconut milk, to make it all rich and sticky. Allow the rice to cool, and then wrap in banana leaves and place under the hot grill to achieve the slightly toasted, smoky flavour that you normally get from cooking it in a bamboo over a small fire and to impart the banana leaf fragrance to the rice. Lemang is best enjoyed slightly warm, with serunding or rendang.

We definitely enjoyed our homemade version...  rich, sticky, aromatic and soft rice.... even with no bamboo, I think this is a pretty darn good version you can easily recreate at home for your family. :)


Click here to watch the video on YouTube :)


Lemang recipe


Lemang (Glutinous Rice Wrapped in Banana Leaf)
Recipe by Baby Sumo
Preparation time: 10 minutes
Cooking time: 40 minutes
Serves 4

Ingredients
250g glutinous rice
2 pandan leaves, knotted
200ml coconut milk
1/2 tsp salt
2-3 large sheets banana leaves, approx. 10"x 8"

1. Soak the rice in cold water for at least 3-4 hours, or overnight. Drain and transfer to a heatproof plate and steam for 25-30 minutes, until the rice is tender. You may steam the rice with the pandan leaves, which will add extra fragrance to the rice. The cooking time will vary depending on the soaking time. (Note: To cut down steaming time, you can also add 1/4 cup water to the rice before steaming. It will help the rice become soft faster).

Lemang recipe without bamboo


2. In a separate pot, gently heat the coconut milk and salt and stir to mix. Set aside to cool slightly.

3. Tip the steamed rice into a large tray and spread it out to help it cool quickly.  Pour the coconut milk over the rice and gently mix it. Set aside to cool.

Lemang recipe without bamboo


4. Place banana leaves in a heatproof plate in the sink and pour over boiling hot water to scald. This is to soften the leaves so that you can easily fold them later. Leave for 1 minute, then remove and wipe dry with kitchen towel.

5. Place a large mound of rice on the leaf, in the shape of a cylinder 2cm from the edges and then roll to form a "sausage" with a diameter of 1.5 to 2 inches. Press gently so that the rice is nice and compact. Repeat for remaining rice.

Lemang recipe without bamboo

Lemang recipe without bamboo


6. Preheat grill to 230°C. Put the rolled rice on a baking tray and place under hot grill for 10 minutes, until slightly burnt around the edges. Remove and allow to cool for 10 minutes.

7. Slice about 1.5cm thick and serve with your favourite rendang or serunding.

Lemang recipe without bamboo

Buy glutinous rice here: https://shope.ee/1VKARM3x6u

Lemang recipe Lemang recipe  Lemang recipe  Lemang recipe  Lemang recipe  Lemang recipe 
How to make lemang at home How to make lemang at home How to make lemang at home How to make lemang at home How to make lemang at home How to make lemang at home

If you enjoyed reading my posts, LIKE me on Facebook! You can also follow me on Instagram (@babysumo) for more photo updates or subscribe to our YouTube channel.Thanks :)
Related Posts Plugin for WordPress, Blogger...