Showing posts with label Pickles. Show all posts

Tuesday, June 9, 2020

Recipe: Chicken Kurma + Easy Cucumber Pickles (Acar Timun)

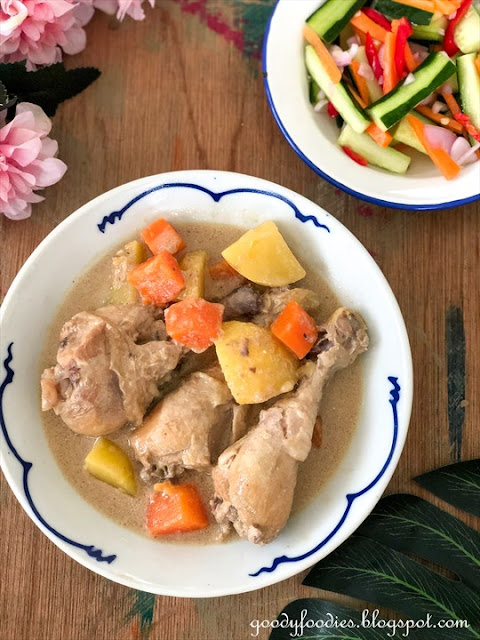
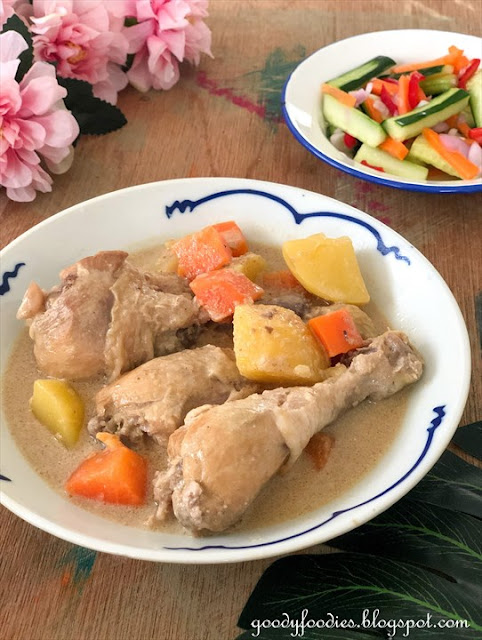
Chicken kurma (ayam masak kurma) is a lovely, mild and thick curry which can be enjoyed by the whole family. I used a ready made chicken kurma paste (we tried the brand, Lizar), which Hubby got from the supermarket. Super convenient, as all I needed to do was peel the potatoes and carrot and cut them up, and simmer along with chicken drumsticks, water and coconut milk.

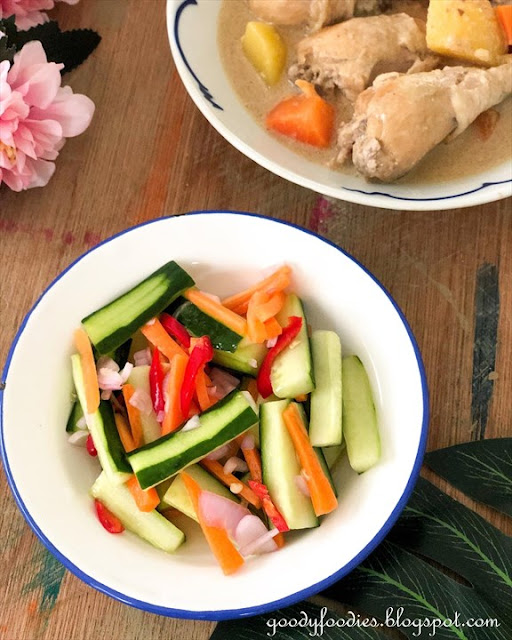
You can serve chicken kurma with rice or flatbreads, as well as a pickle on the side. I am also sharing this easy 15-minute pickle recipe for acar timun (aka cucumber pickles, with carrots, shallots and red chilli).

chicken kurma recipe


chicken kurma recipe


Easy Chicken Kurma (Ayam masak kurma)
Recipe by Baby Sumo
Preparation time: 5 minutes
Cooking time:  50 minutes
Serves 6-8

Ingredients
1 pack (150g) Lizar chicken kurma paste
1 kg chicken drumsticks
4 potatoes, peeled and cut into chunks
1 carrot, peeled and cut into chunks
400ml water
150ml coconut milk

1. In a heavy based pot over medium high heat, place water and chicken kurma paste. Stir to blend the paste.

2. Add the chicken and simmer for 10 minutes over medium heat.

3. Add potatoes and cook for a further 30 minutes, then add carrots and coconut milk and simmer for a further 10 minutes. Season with salt, if necessary. Serve with rice or flatbread.

chicken kurma recipe
chicken kurma recipe chicken kurma recipe chicken kurma recipe chicken kurma recipe chicken kurma recipe chicken kurma recipe chicken kurma recipe chicken kurma recipe chicken kurma recipe
Acar timun (Cucumber pickle)
Ingredients
1 Japanese cucumber, peeled at intervals
1/2 carrot, peeled and cut into matchsticks
1/2 red chilli, thinly sliced
1 shallot, thinly sliced

For pickling
Juice of 1 lime
1 tsp salt
1 tbsp caster sugar
1 tsp white balsamic vinegar


1. Place all ingredients for pickling in a small bowl and mix well until sugar and salt is dissolved.

2. Slice the cucumber to 2 inch lengths, then quarter. Place in a bowl along with carrot, chilli and shallot and add the pickling solution.  Mix well and leave for at least 15 minutes.


acar timun recipe
acar timun recipe acar timun recipe acar timun recipe acar timun recipe acar timun recipe acar timun recipe acar timun recipe acar timun recipe acar timun recipe acar timun recipe acar timun recipe
If you enjoyed reading my posts, LIKE me on Facebook! You can also follow me on Instagram (@babysumo) for more photo updates or subscribe to our YouTube channel. Thanks :)

Thursday, May 14, 2020

Recipe: Acar Jelatah

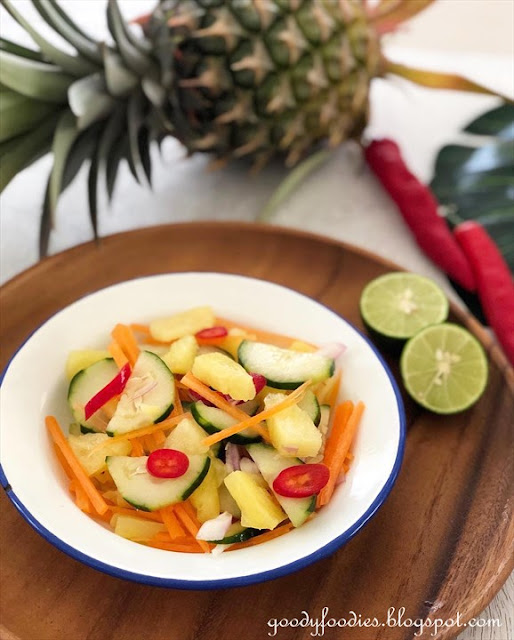
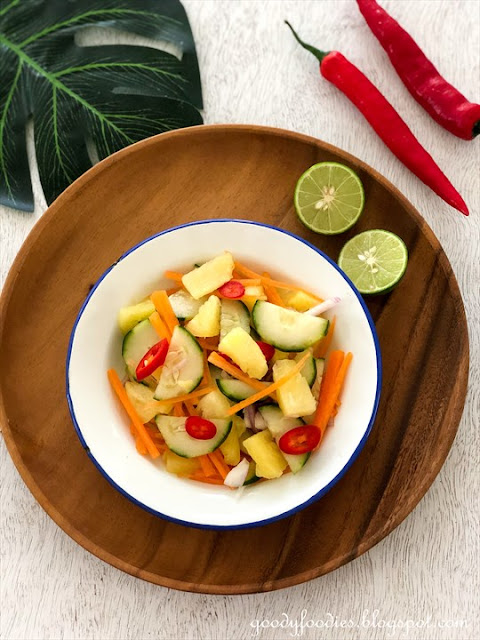
Introducing my favourite Malay pickle, acar jelatah. Crunchy, tangy and refreshing, acar jelatah goes perfectly with any Malay meal, as it cuts through some of the richness of the curries, rendang, rice or meat dishes.

Acar jelatah recipe


Acar jelatah is usually made up of cucumber, carrots, pineapple, shallots and red chilli. This is a quick pickle recipe, and will be ready in under 30 minutes. It's so easy that I've been making this rather often during this MCO period. Any leftovers can be kept in a clean jar for a day or two in the fridge, but I do recommend finishing it on the day it is made.

Acar jelatah recipe


Check out the step-by-step video instructions here on YouTube:


Here's the recipe:

Acar Jelatah
Recipe by Baby Sumo
Preparation time: 10 minutes (+15 minutes waiting time)
Serves 4

Ingredients
100g Japanese cucumber, peeled at regular intervals
50g carrots, peeled and julienned
100g pineapple, cut into small chunks
1 shallot, peeled, quartered and sliced thinly
1 red chilli, thinly sliced

For pickling solution
1 1/2 tbsp rice vinegar
Juice of 1 lime
2 tbsp caster sugar
1 1/2 tsp salt

1. Mix all the ingredients for the pickling in a small bowl, until all sugar is dissolved.

2. Put cucumber, carrots, pineapple, shallot and chilli in a large bowl and pour over the pickling solution. Leave for at least 15 minutes.

3. Enjoy! Any unused pickles can be stored in the fridge for a few days.

Acar jelatah recipe

Buy rice vinegar herehttps://shope.ee/308yEGpb3B
Acar jelatah recipe Acar jelatah recipe Acar jelatah recipe Acar jelatah recipe Acar jelatah recipe Acar jelatah recipe Acar jelatah recipe Acar jelatah recipe Acar jelatah recipe Acar jelatah recipe
If you enjoyed reading my posts, LIKE me on Facebook! You can also follow me on Instagram (@babysumo) for more photo updates or subscribe to our YouTube channel.Thanks :)

Wednesday, March 19, 2014

Recipe: Homemade Pork Tacos with an Asian Twist + WORLDFOODS giveaway

A taco is a traditional Mexican dish consisting of a corn or wheat tortilla with a variety of fillings, such as beef, pork, seafood, vegetables and cheese. Recently, we have been buying quite a lot of wholemeal tortilla (for our "pizza" bases) and Hubby saw on Instagram that we could also make hard-shell, U-shaped taco shells with them. Of course you can buy ready-made taco shells but they usually come in a box of 12s and it's hard to finish them all before they lose their crunchiness (and some are already broken while being transported around). 


Homemade Pork Tacos with an Asian Twist


The solution - make your own taco shells. It's really simple - just drape the tortilla sheet over 2 bars of your oven rack and bake for 7-8 minutes until crispy and hard. This way, you only make what you need. Since a whole tortilla sheet may be too big, you can opt to cut it in half before draping for daintier shells.


For the filling, we decided to give it an Asian twist, by stir frying the minced pork with the WORLDFOODS Thai green curry paste. We also topped it with scrambled eggs to add creaminess to the taco. Other garnishes include chopped cherry tomatoes, mozzarella cheese, parsley and some Asian pickled green chillies (you can also use jalapenos).

And what a delicious taco it was! Well-balanced textures and flavours - sweet, sour, salty, crunchy and creamy, all in one bite :). And such pretty colours too!


GIVEAWAY!
Thanks to WORLDFOODS, I have 2 bottles of this Thai green curry sauce to giveaway. All you need to do is leave a comment below stating "I want to enter this giveaway" with your name and e-mail address. This giveaway is open to Malaysia only. 2 winners will be drawn (1 bottle each) at random on 26 March 2014 and notified via email. Those who have entered previously can enter again :)

Note: WORLDFOODS products are food allergens free, trans-fat free and gluten free with no artificial preservatives, coloring or flavouring, as well as being suitable for vegetarians, vegans, coeliacs and Muslims. In KL, WORLDFOODS products are available at Village Grocer (Bangsar Village 1, Sunway Giza, Mt Kiara), Jaya Grocers (Intermark, Empire Shopping, Plaza Jelutong) and Hock Choon @ Ampang.


And the winners of the giveaway are: Winnie (No.11) and Emily Ang (No.6). Thanks to all who entered! Please reply to the email that I have sent to you.


Homemade Pork Tacos with an Asian Twist
Recipe by Baby Sumo
Preparation time: 10 minutes
Cooking time: 10-12 minutes
Serves 2

Ingredients
2 tortilla wraps or store-bought taco shells
200g minced pork (or chicken)
2 cloves garlic
1 1/2 tbsp cooking oil
1/8 tsp salt
2-3 tbsp WORLDFOODS Thai green curry paste

For the scrambled eggs
2 large eggs
1 tbsp butter
Salt and freshly ground pepper
1 tsp milk/cream

Garnish
2-3 tbsp pickled green chillies or Jalapeno
6-8 cherry tomatoes, chopped
3-4 tbsp grated mozzarella cheese
Fresh parsley, leaves plucked

1. Preheat oven to 190°C. Drape each tortilla over two bars of your oven rack and bake for about 7-8 minutes or until crispy.

Make your own taco shells! :)


2. Using a frying pan, heat cooking oil over medium high heat. Add garlic and fry for 2 minutes, until lightly browned. Add the minced pork and fry for about 5 minutes, until the pork is golden. Finally, stir in the WORLDFOODS Thai green curry paste and stir well for another minute until the pork is evenly coated. Taste, and season with salt as necessary. Set aside.

3. In a separate pan, break the eggs and add half the butter. Over medium low heat, use a spatula to stir the eggs to combine egg. Keep stirring (as you would when cooking a risotto - do not stop stirring). Add the remaining butter as the mixture begins to set. Do not let it get too hot, you will need to move the pan on and off the heat - about 2-3 times. The eggs will take about 3-4 minutes to cook. Add the milk/cream (it brings the temp of the eggs down hence stops the cooking process via residual heat) and season the eggs with salt and pepper.

4. To assemble, first place half the cooked minced pork (from Step 2) into each shell. Next, layer the cherry tomatoes, followed by the scrambled eggs (from Step 3). Top with mozzarella cheese, Asian pickled green chillies and fresh parsley. Tuck in!


If you enjoyed reading my posts, LIKE me on Facebook! You can also follow me on Instagram (@babysumo) for more photo updates. Thanks :)

*This recipe was featured on Asian Food Channel's FB page on 26 March 2014.

Sunday, July 21, 2013

Recipe: Japanese pickled ginger (Gari ガリ)

When dining in a Japanese restaurant (especially when we're having sushi or sashimi course), a small dish of pickled ginger would always be present at our table. Pickled ginger, known as Gari ガリ in Japanese, is a type of tsukemono (pickled vegetables) and is usually used as a palate cleanser.


It is made from young ginger which has been sliced thinly, then salted and finally marinated in a sugar/rice vinegar solution. The ginger will change colour to light pink. It can then be stored in the fridge for 2-3 months. If you see pickled ginger in a brighter pink hue, they may have been artificially dyed to intensify the colour - only very young ginger can develop the natural pink tint.


So easy to make at home :)


Japanese Pickled Ginger - Gari ガリ
Recipe adapted from Japanese Bible cookbook
Preparation time: 15-20 minutes
Cooking time: 2 minutes
Makes 1 cup

Ingredients
300g young fresh ginger
1/2 tsp salt
1 cup Japanese rice vinegar
2/3 cup caster sugar

1. Wash the ginger and rub skin under cold water. Using a vegetable peeler, peel off the skin. Slice the ginger thinly on a mandoline or use a very sharp knife.

2. Place ginger slices in a bowl and sprinkle the salt over it. Toss to combine, and leave for 1 hour.

3. Dry the ginger slices with a paper towel, and then pack into a sterilised jar.

4. Combine the rice vinegar and sugar in a small saucepan over high heat until sugar dissolves, then bring to the boil. Pour into the jar over the ginger slices, and set aside to cool. The ginger will change colour to a light pink.

5. When cool, cover and seal the jar. Store in refridgerator, up to 3 months.


For Japanese pickled cucumber recipe, click here.


If you enjoyed reading my posts, LIKE me on Facebook! Thanks ;)

*I am submitting this to Little Thumb's Up "Ginger" event hosted by Alvin @ Chef and Sommelier.

Monday, October 29, 2012

Recipe: Homemade Asian Pickled Green Chillies

Pickled green chillies are a great accompaniment to many Asian dishes, especially noodles. I love eating it with my dry wantan noodles or Hakka mee. Usually, a restaurant that serves this alongside their noodles will get extra brownie points from me.


Though I love eating it in restaurants, I do not like the idea of buying it from the supermarket since there are preservatives and other additives in there. I decided to make my own and was surprised how easy it was. It was literally done in under 20 minutes, and the pickled chillies were ready to eat the following day. You can store this in your fridge for a while, but I reckon if you have a little everyday, this will last you less than 3 weeks.


What you must remember is to put on disposable gloves when handling the chillies, especially since you'll be cutting up a whole load of them and you may need to remove some of the seeds. Or else you will suffer from the "chilli burn" later on.

After one day, the pickled chillies will turn from a vivid green to a dark (dull) green hue. Homemade pickled green chillies definitely feels fresher and crunchier (since it is stored in the fridge), and is so appetizing! Everyone should have a jar of this in their fridge ;) I reckon this would work just as well with jalapeño peppers.


How to Make Pickled Green Chillies Video (click here to watch video in full screen)


Pickled green chillies
Recipe by Baby Sumo, adapted from Amy Beh - Kuali
Preparation time: 20 minutes
Makes 1 large jar (approx. 20 servings)

Ingredients
300g green chillies
1/2 cup vinegar
1 cup boiled water, cooled
1 tbsp salt
5 tbsp caster sugar

Extra hot water, for Step 2


1. Wash and drain chillies well in a plastic colander.


2. Put on disposable gloves and cut chillies into thin round slices. Remove any seeds that look brownish (if you want it to be less spicy, then remove most of the seeds). Pour hot water over the sliced chillies and leave to sit for 10-15 seconds. Drain well and transfer chillies into a large jar.


3. In a separate bowl, mix vinegar, water, salt and sugar until sugar dissolves. Pour mixture into jar to pickle the chillies. The chillies will be ready the next day (or in a few hours time). Store in fridge until required. It will keep well for a year.


Before (vivid green)


After (dull green) - ready to eat!


Perfect with a bowl of noodles! (recipe for Hakka mee version 2.0 here)


*This recipe was featured on Asian Food Channel's FB page on 5 Nov 2012. 
Related Posts Plugin for WordPress, Blogger...